How to Make a Minecraft Skin in 2026 (Step by Step)
 PixelSkin
Four ways to make your own Minecraft skin: generate it with AI, start from a photo, paint it in 3D, or edit the 64x64 template. Steps, tips, and how to upload it.
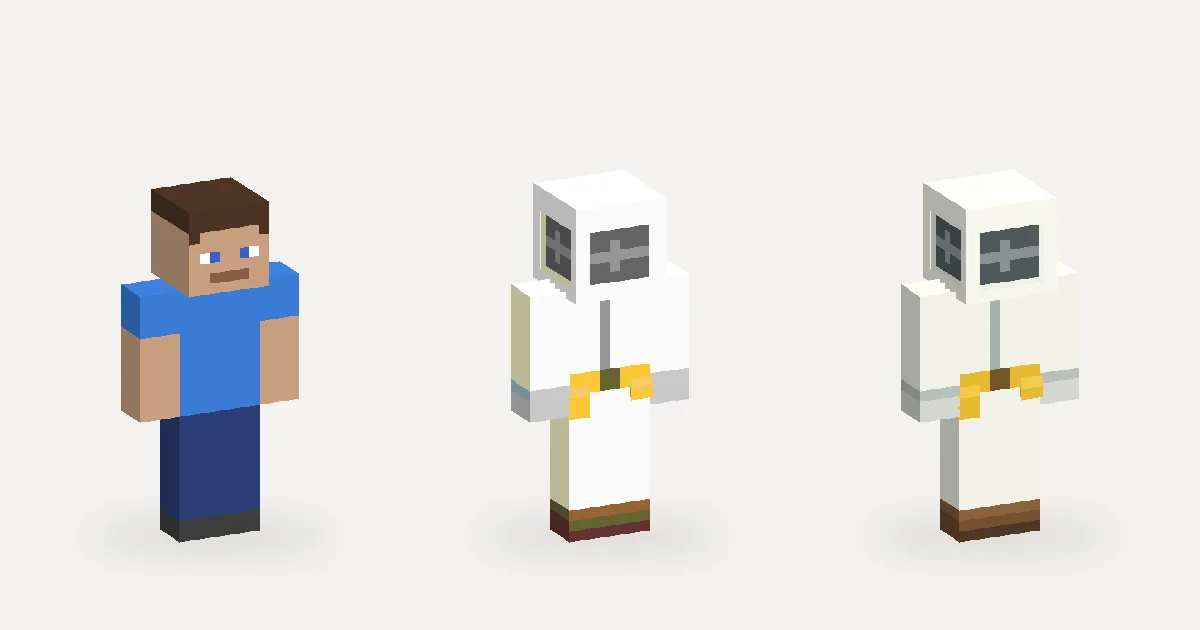
A Minecraft skin is a small PNG image, 64 by 64 pixels, that the game wraps around the player model. Making your own comes down to filling that image with the right colors in the right places. There are four practical ways to do it in 2026, from "type a sentence" to "paint every pixel yourself".
Quick answer: to make a custom Minecraft skin, describe the character to an AI skin generator or paint it on a 3D model in a skin editor, check it from every side, export a 64×64 PNG, and upload it in the Minecraft Launcher (Java) or the Dressing Room (Bedrock).
What you are actually making
Every skin file follows the same layout: the head, body, arms and legs are each unfolded into flat rectangles, plus a second "outer" layer for hats, hair, jackets and sleeves. You never need to memorize it, but it helps to know it exists, because it explains why a stroke on the flat image can land on a surprising part of the body. The Minecraft skin template guide walks through the layout pixel by pixel.
Two things to decide before you start:
- Arm width. Classic (Steve) arms are 4 pixels wide, Slim (Alex) arms are 3. Pick one and remember it, because you choose the same model when you upload.
- Who the character is. Write one sentence: role, outfit, main colors, one detail. "A beekeeper in a white suit with a mesh hood and a yellow tool belt" is enough to start.
Method 1: Generate the skin from a description
This is the fastest way to make your own Minecraft skin, and it is a good starting point even if you plan to finish by hand.
- Open an AI skin generator such as the one on our homepage.
- Describe the character in plain words. Lead with the role, then the outfit, colors and details.
- Let the AI paint the first version. A good generator paints the whole body and checks the front, back and sides before it stops.
- Look at it from all four sides and ask for changes in words: "make the boots darker", "add a red scarf".
- Export the 64×64 PNG.
Prompt tips that make a real difference:
- Name colors explicitly. "Dark green jacket" beats "forest vibes".
- Say where things go. "A patch on the left shoulder" is clearer than "a patch".
- Keep it to three or four main pieces. A skin has 8 pixels across the face; tiny details disappear.
- Mention what goes on the outer layer: hoods, helmets, hair and coats look better with a little depth.
We wrote a longer, honest look at what AI skin generators get right and wrong if you want to know where to expect touch-ups.
Method 2: Start from a photo or drawing
If the look already exists, as an outfit photo, a character sheet or your own sketch, upload it as a reference. The AI picks out the main colors and pieces of clothing and maps them onto the front, back and sides. Anything the picture does not show, like the back of a coat, gets filled in to match.
What works best:
- A front-facing, full-body picture with even lighting.
- A short note for what the picture cannot show: "the back of the jacket has a white logo".
- Your own photos and drawings. Uploading someone else's artwork does not make the result yours to share.
Method 3: Paint it by hand on a 3D model
Painting directly on the 3D character removes the guesswork of the flat layout. A browser skin editor gives you a brush, eraser, color picker and fill tool, and every click lands on an exact skin pixel.
A simple order that keeps things tidy:
- Fill the base colors. Skin tone for the head and hands, then shirt, pants and shoes. Use the fill tool per face.
- Paint the face. Eyes are usually 2 pixels wide with one pixel of white or a lighter color. Leave a gap of 2 pixels between them.
- Add shading. Pick two shades for each color: one darker for the bottom and sides, one lighter for highlights. Three tones per material is plenty.
- Use mirror for limbs. Paint the right arm, then mirror it to the left. Same for the legs.
- Add the outer layer last. Hair that sticks out, a hood, a jacket collar. Toggle the layer on and off to check it.
Method 4: Edit the template in an image editor
Pixel art apps such as Aseprite, GIMP or Paint.NET can edit the skin PNG directly. This gives you full control but needs care:
- Keep the canvas at exactly 64×64 and export as PNG, not JPG.
- Keep the background transparent. Paint only inside the template rectangles.
- Turn off anti-aliasing and smoothing. Every pixel should be a single solid color.
- Remember the outer layer areas. Semi-transparent pixels there show up as a faint film over the body.
A 3D preview is still worth it at the end: seams between the front and the sides are hard to spot on the flat image.
Tips for a skin that reads well in game
- Big shapes first. From across a field, people see the silhouette and two or three main colors, not your stitching.
- Contrast between parts. If the shirt and pants are similar, add a belt or a darker shade to split them.
- Avoid noise. Random single-pixel speckles look like dirt. Use texture on purpose: stripes, stitches, a clear pattern.
- Check every side. The back and the sides of the arms are where most homemade skins look unfinished.
- Watch it move. A walk preview shows whether the arm and leg sides line up.
Upload your skin
In Java Edition, open the Minecraft Launcher, go to Skins → New Skin, pick the arm model, browse to your PNG and choose Save & Use. In Bedrock on Windows, Android, iPhone or iPad, open the Dressing Room → Classic Skins → Owned → Import → Choose New Skin. Consoles cannot import skin files. The full walkthrough, including fixes for common problems, is in how to change your skin in Minecraft.
Steps checked against the official Minecraft Help article on November 3, 2026.
Make it original
Skins based on famous characters are everywhere, but they are someone else's design. The skins worth sharing are the ones you invent: your own role, your own colors, a detail only your character has.
Try it now
Open the editor with this prompt already filled in, change anything you like, and generate:
A beekeeper in a white suit with a mesh hood, yellow tool belt and brown boots →